0 情景导入
- 在Windows10 Home版操作系统下安装Linux子系统(WSL2),用于轻量需求,方便快捷。
- 在微软商店内安装Linux子系统会默认安装到C盘,根据官方文档指示可以安装到其他盘(未成功)。
- 自定义Linux子系统,安装到非C盘。
1 安装WSL2(未成功)
1.1 启用Windows子系统功能
在安装子系统之前,启用Windows子系统功能,在Windows10的Powershell中输入:
1 | dism.exe /online /enable-feature /featurename:Microsoft-Windows-Subsystem-Linux /all /norestart |
1.2 检查WSL2依赖是否满足
- For x64 systems: Version 1903 or higher, with Build 18362 or higher.
- For ARM64 systems: Version 2004 or higher, with Build 19041 or higher.
- Builds lower than 18362 do not support WSL 2. Use the Windows Update Assistant to update your version of Windows.
检查Windows版本:win+R,输入winver
1.3 启用虚拟机功能
管理员模式打开Powershell:
1 | dism.exe /online /enable-feature /featurename:VirtualMachinePlatform /all /norestart |
1.4 下载Linux内核更新包
- 下载最新安装包:跳转
- 点击安装上述的安装包
1.5 将 WSL 2 设置为默认版本
在Powershell中运行:
1 | wsl --set-default-version 2 |
1.6 安装Linux发行版
1.6.1 微软商店安装(只能安装在C盘)
1.6.2 命令行安装(可以安装在其他盘)
-
cmd下,在自定义目录中下载:
1
curl.exe -L -o ubuntu-1604.appx https://aka.ms/wsl-ubuntu-2004
-
安装:
1
Add-AppxPackage .\app_name.appx
但是出错:
1
2
3
4
5
6
7
8
9
10
11
12
PS D:\virtual_machine\WSL\Ubuntu> Add-AppxPackage .\Ubuntu2004.appx
Add-AppxPackage : 部署失败,原因是 HRESULT: 0x80073CF3, 包无法进行更新、相关性或冲突验证。
从 (Ubuntu2004.appx) 使用程序包 CanonicalGroupLimited.Ubuntu20.04onWindows_2004.2020.424.0_x64__79rhkp1fndgsc 中的目
标卷 C: 执行的部署 Add 操作失败,错误为 0x80073CF3。有关诊断应用部署问题的帮助,请参阅 http://go.microsoft.com/fwlink/?
LinkId=235160。
注意: 有关其他信息,请在事件日志中查找 [ActivityId] a0925605-afc5-0005-a072-92a0c5afd701,或使用命令行 Get-AppPackageLo
g -ActivityID a0925605-afc5-0005-a072-92a0c5afd701
所在位置 行:1 字符: 1
+ Add-AppxPackage .\Ubuntu2004.appx
+ ~~~~~~~~~~~~~~~~~~~~~~~~~~~~~~~~~
+ CategoryInfo : WriteError: (D:\virtual_mach...Ubuntu2004.appx:String) [Add-AppxPackage], IOException
+ FullyQualifiedErrorId : DeploymentError,Microsoft.Windows.Appx.PackageManager.Commands.AddAppxPackageCommand问题解决,应该是home版的windows有关,暂时没有解决。
2 安装自定义系统(成功)
安装后的问题:
ping baidu.com反应慢,ping 8.8.8.8还可以
2.1 从容器中导出 tar
在Ubuntu虚拟机中进行操作:
1 | # 安装docker |
2.2 将 tar 文件导入 WSL
在Windows的powershell中操作:
1 | # 在选定目录下导入 tar 文件: wsl --import <DistroName> <InstallLocation> <InstallTarFile> |
3 安装Terminus终端
-
Terminus下载安装,点击
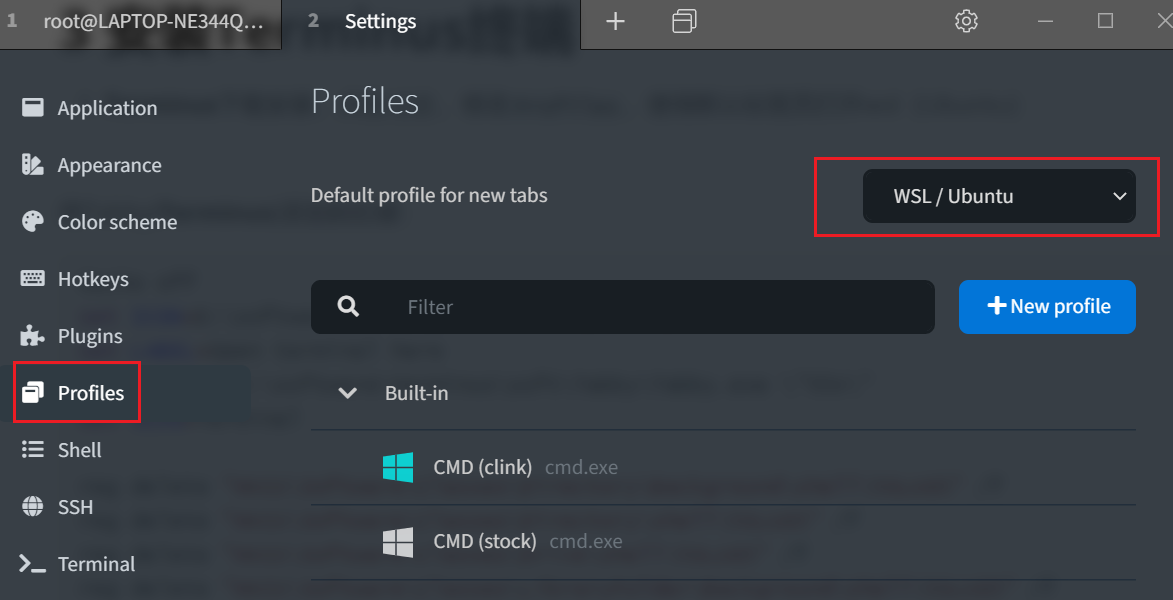
设置,修改Profiles,使得默认标签页打开wsl(Ubuntu)
-
将Tabby(Terminus)添加到右键打开:
1
2
3
4
5
6
7
8
9
10
11
12
13
14
15
16
17
18
19
20
21
22
23
24
25
26
27@echo off
set ICON=D:\software\terminus\soft\Tabby\Tabby.exe #改成自己的
set LABEL=Open terminal here
set COMMAND=D:\software\terminus\soft\Tabby\Tabby.exe \"%%V\" #改成自己的
set SLUG=Terminal
reg delete "HKCU\Software\Classes\Directory\Background\shell\%SLUG%" /f
reg delete "HKCU\Software\Classes\Directory\shell\%SLUG%" /f
reg delete "HKCU\Software\Classes\Drive\shell\%SLUG%" /f
reg delete "HKCU\Software\Classes\LibraryFolder\Background\shell\%SLUG%" /f
reg add "HKCU\Software\Classes\Directory\Background\shell\%SLUG%" /f /ve /t REG_SZ /d "%LABEL%"
reg add "HKCU\Software\Classes\Directory\Background\shell\%SLUG%" /f /v "Icon" /t REG_SZ /d "%ICON%"
reg add "HKCU\Software\Classes\Directory\Background\shell\%SLUG%\command" /f /ve /t REG_SZ /d "%COMMAND%"
reg add "HKCU\Software\Classes\Directory\shell\%SLUG%" /f /ve /t REG_SZ /d "%LABEL%"
reg add "HKCU\Software\Classes\Directory\shell\%SLUG%" /f /v "Icon" /t REG_SZ /d "%ICON%"
reg add "HKCU\Software\Classes\Directory\shell\%SLUG%\command" /f /ve /t REG_SZ /d "%COMMAND%"
reg add "HKCU\Software\Classes\Drive\shell\%SLUG%" /f /ve /t REG_SZ /d "%LABEL%"
reg add "HKCU\Software\Classes\Drive\shell\%SLUG%" /f /v "Icon" /t REG_SZ /d "%ICON%"
reg add "HKCU\Software\Classes\Drive\shell\%SLUG%\command" /f /ve /t REG_SZ /d "%COMMAND%"
reg add "HKCU\Software\Classes\LibraryFolder\Background\shell\%SLUG%" /f /ve /t REG_SZ /d "%LABEL%"
reg add "HKCU\Software\Classes\LibraryFolder\Background\shell\%SLUG%" /f /v "Icon" /t REG_SZ /d "%ICON%"
reg add "HKCU\Software\Classes\LibraryFolder\Background\shell\%SLUG%\command" /f /ve /t REG_SZ /d "%COMMAND%"
4 配置oh-my-zsh
zsh是一个Linux下强大的shell, 由于大多数Linux产品安装以及默认使用bash shell, 但是丝毫不影响极客们对zsh的热衷, 几乎每一款Linux产品都包含有zsh,通常可以用apt-get、urpmi或yum等包管理器进行安装。
zsh是bash的增强版,其实zsh和bash是两个不同的概念,zsh更加强大。
通常zsh配置起来非常麻烦,且相当的复杂,所以oh-my-zsh是为了简化zsh的配置而开发的,因此oh-my-zsh算是zsh的配置。
4.1 安装zsh
-
安装zsh
1
apt install zsh -y
-
检查安装是否成功:
1
2
3
4
5
6
7
8
9cat /etc/shells
# /etc/shells: valid login shells
/bin/sh
/bin/bash
/bin/rbash
/bin/dash
/usr/bin/tmux
/bin/zsh
/usr/bin/zsh -
zsh设为默认shell,新开标签页生效
1
chsh -s /bin/zsh
4.2 oh-my-zsh安装与配置
-
安装:
1
2
3sh -c "$(curl -fsSL https://raw.github.com/robbyrussell/oh-my-zsh/master/tools/install.sh)"
# 或者
sh -c "$(wget https://raw.github.com/robbyrussell/oh-my-zsh/master/tools/install.sh -O -)"出现安装报错:
1
curl: (7) Failed to connect to raw.githubusercontent.com port 443: Connection refused
解决:
-
如果科学上网应该不会出现此情况;
-
如果不能科学上网可以这样做:
-
打开网站:
https://www.ipaddress.com/, 查询一下raw.githubusercontent.com对应的IP 地址 -
在hosts文件中添加:
sudo vim /etc/hosts1
199.232.28.133 raw.githubusercontent.com
-
-
-
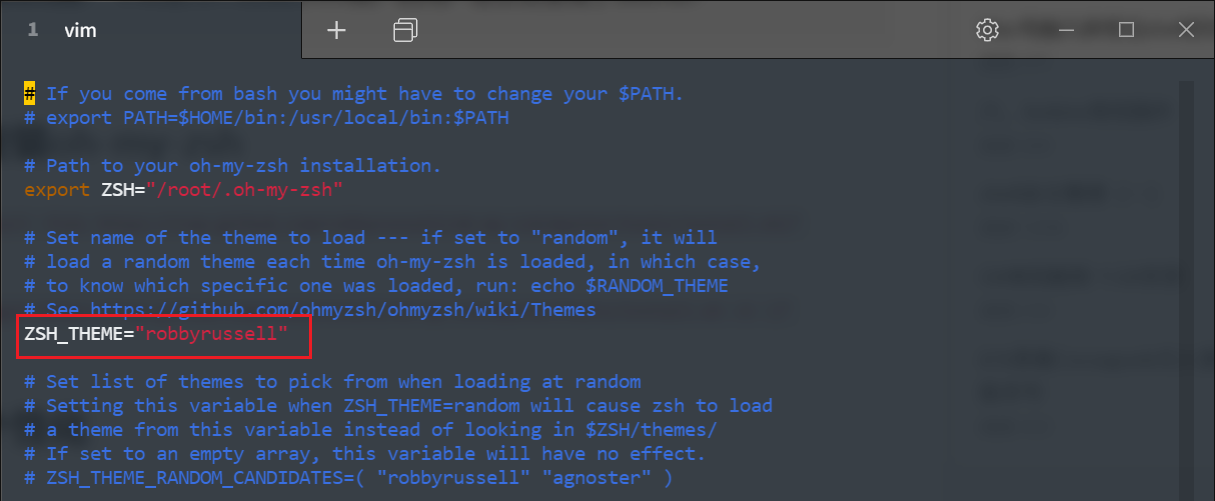
主题使用robbyrussell,
vim ~/.zshrc
-
安装插件:
1
2
3
4
5
6
7
8
9
10
11
12
13
14# 修改配置文件
vim ~/.zshrc
## 添加内容
plugins=(git zsh-autosuggestions zsh-syntax-highlighting autojump extract)
# 解压插件,解压一个命令x全搞定
extract # 不用安装
# 安装autojump自动跳转插件
apt install autojump
# 安装zsh-autosuggestions语法历史记录插件
git clone git://github.com/zsh-users/zsh-autosuggestions $ZSH_CUSTOM/plugins/zsh-autosuggestions
# 安装zsh-syntax-highlighting语法高亮插件
git clone https://github.com/zsh-users/zsh-syntax-highlighting.git $ZSH_CUSTOM/plugins/zsh-syntax-highlighting
# 配置文件生效
source ~/.zshrc
